Insert table
- Select place where insert table
-
Click toolbar button icon . Table dialog will open:
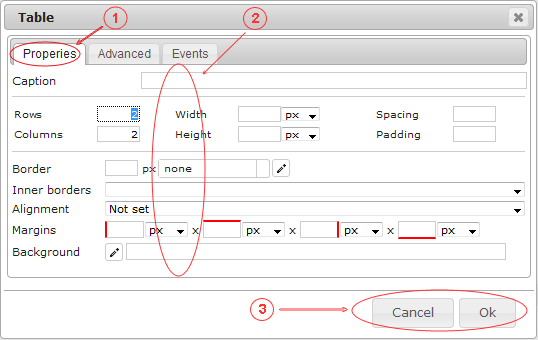
- Enter table properties:
- "Properties" tab selected
- Fill properties fields
- Caption
- Rows - ex. 2
- Columns - ex. 2
- Width - ex. 100px
- Height - ex. 100px
- Spacing
- Padding
- Border (line width, line type, color)
- Inner borders
- Aligment
- Margins
- Background
- Click button: "OK" - insert table, "Cancel" - cancel action
You can define table more detailed in other tabs:
- Advanced:
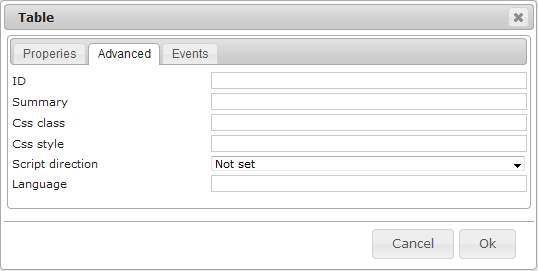
- ID
- Summary
- CSS class
- CSS style
- Script direction
- Language
- Events
Inserted table result:
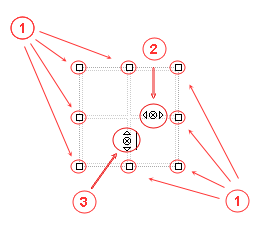
Place mouse cursor into any cell and edit table with controls:
- Width and height visual edit controls
- Delete column visual control
- Delete row visual control
HTML (source) code:
<table style="width:100px;height:100px"><tbody><tr><td> </td><td> </td></tr><tr><td> </td><td> </td></tr></tbody></table>
Edit table with toolbar button icons
Place mouse cursor on table. Click toolbar button icon:
Edit table cell properties
- Place mouse cursor into table cell
-
Click toolbar button icon . Table cell properties dialog will open:
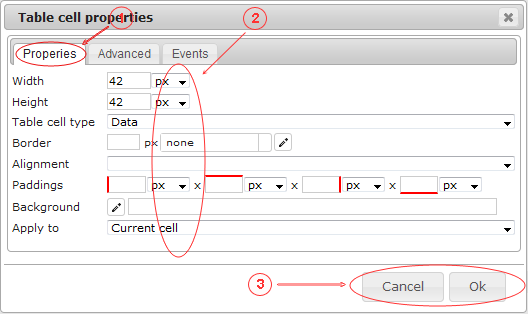
- Enter table cell properties:
- "Properties" tab selected
- Fill properties fields
- Width
- Height
- Table cell type (data/header)
- Border (line width, line type, color)
- Aligment
- Paddings
- Background
- Apply to: current cell, all cells in row, all cells in column, all cells in table
- Click button: "OK" - save table cell properties, "Cancel" - cancel action
You can define table cell more detailed in other tabs:
- Advanced:
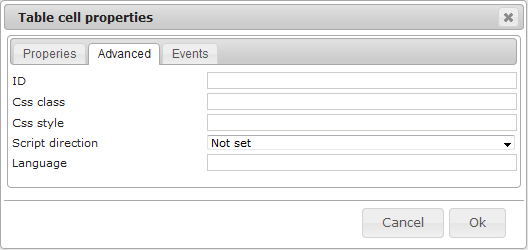
- ID
- Summary
- CSS class
- CSS style
- Script direction
- Language
- Events
